Different architecture firms approach the design process in different ways. Here at Modative, we are beyond thorough. Recently, we began working on a new single-family residence in Culver City, CA, a stone's throw from our office. We thought it would be fun to take you through Modative's design process, using this new project, Roberts Avenue, as the example. So, here it goes.
Before pen ever meets paper, we undergo a thorough site analysis. Many firms skip right on by this, what we feel to be, the crucial first step of the design process. We believe that the site should influence the design. Our site analysis covers topics such as physical site conditions, prevailing winds, street grids, circulation to and from the site, views in and views out, noise, and neighborhood character.

3 diagrams showing views, noise, and pedestrian access

View north on Roberts Avenue

View from what will be the second floor of the new house

A few interesting modern homes in the neighborhood
We keep the client involved in every step of the process, so once we've hashed through the site analysis, we present the information we've gathered to the client. We figure that if the client is with you through these initial steps, once you get into the schematic design phase, the sketches you show him/her will not seem to have come out of nowhere. Most importantly, the decisions you are making will not seem arbitrary -- they will be rooted in your initial site and precedent studies. Both you and the client will be able to reference back to this gathered information as the design progresses.
At this point, during our first presentation to the client, we also discuss the project's program, budget, and schedule. Once we have a better understanding of these three criteria, we launch into the design of the building. On this project, our intern, Jonathan Ackerman, built a series of small massing models at 1/16"=1'0" studying possible configurations based on allowable square footage and the influences of the surroundings. This is where the site considerations previously mentioned come into play. Knowing that this site is located next to a public park and across the street from an elementary school informs how the masses are organized.
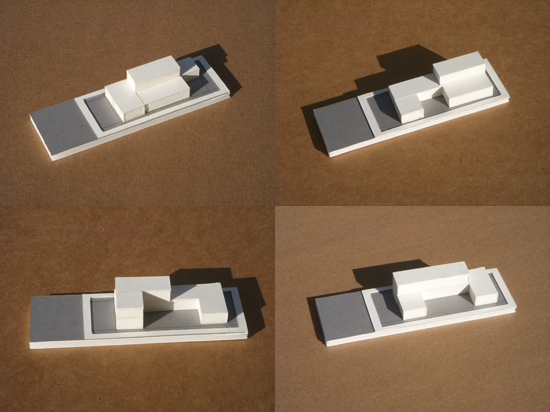
4 massing models by Jonathan Ackerman
The next step is to sit down with everyone in the office (all 5 of us at the time) and brainstorm. We give the same presentation to the office that we gave to the client and go through each of the massing models. Then the trace paper is rolled out, everyone gets quiet, and starts feverishly sketching. This is the fun part. (I like to stop sketching 5 minutes into it, take a peak at everyone else's sketches, and let my thoughts be catapulted in a completely new direction.) This is the time to not hold back. Every idea is possible.
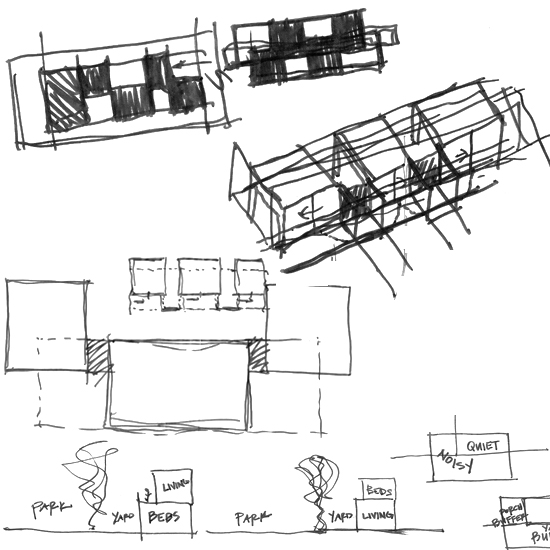
Sketches of what will become Scheme A
When everyone has exhausted their supply of trace, each person explains their thoughts to the group. (It's amazing how, after seeing the same site analysis presentation, everyone's schemes have common threads. It shows you that the site really does drive the design.) Once we've thoroughly dissected each person's concepts, we settle on 2-3 schemes that the project designer will further develop to show the client.
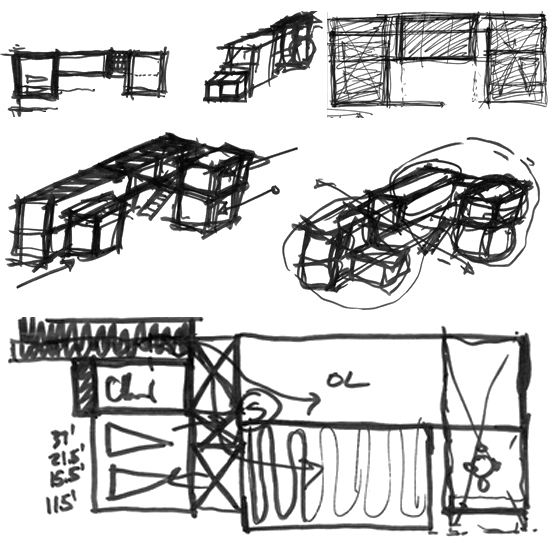
Sketches of what will become Scheme B
Before starting to develop these schemes, we research relevant precedents. Inspiration and direction both come from studying what others have done to solve problems similar to those you are facing in your design challenge.
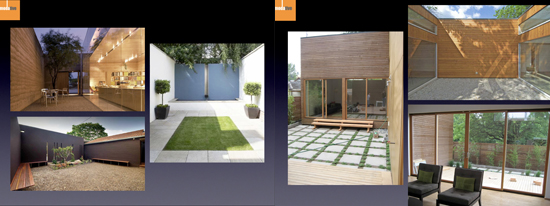
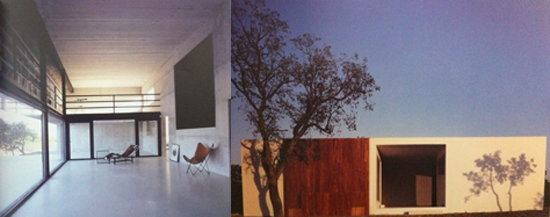
Precedent images taken from slides from our client presentation
At this point, the project designer takes everyone's sketches and began translating these sketched concepts into actual floor plans and massing models in ArchiCAD. We decided to continue to develop 2 of the schemes that came out of our in-office charrette.
After these floor plans were developed enough to talk about, we had another quick meeting with the office to get input from everyone on any minor adjustments that need to be made.

Scheme A draft renderings

Scheme B draft renderings
Maintaining this idea that the client needs to be brought along beside us every step of the process, before we even show floor plans and renderings, we show some 3D diagrams explaining the reasoning that is informing our design decisions.


Scheme A diagrams

Scheme B diagrams
At this point, all of the layouts are in ArchiCAD. However, we choose to sketch over print-outs of the layouts and show these sketches to the client instead of showing them hard-lined floor plans. Hard-lined floor plans, this early in the design process, give the impression that everything is figured out and that it's too developed to make changes. It's important, at this stage, for the client to feel that their input is welcome and that the design is a malleable thing, not a fixed thing. We also show "sketchier" renderings instead of realistic-looking renderings.
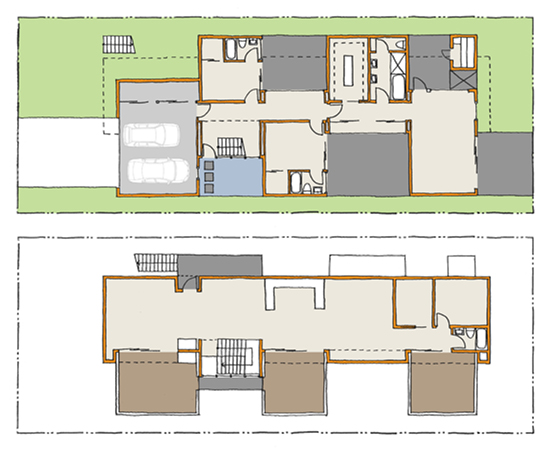

Scheme A sketchy floor plans and renderings
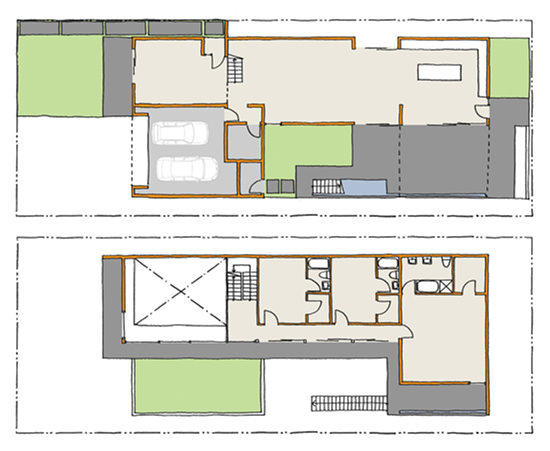

Scheme B sketchy floor plans and renderings
At the end of our presentation of these 2 schemes to the client, the client picks 1 scheme to run with. (They picked Scheme 1. They like -- and so do we -- how the living is on the upper floor to take advantage of the views.) Once 1 scheme is chosen, we have finished the Schematic Design phase and move into the Design Development phase where the floor plans are tightened up, the look of the building is massaged, and materiality that supports the concept is explored. The Schematic Design phase, when all of the above steps are taken, serves to lay the framework for all of the decisions made in the Design Development phase. This is critical in the development of a thoughtful, relevant design.
Post by Krystal Návar. Contributors to this post include Christian Návar, Derek Leavitt and Michael Scott .


